
Last Updated on
By John Buol
Shot placement trumps all concerns about equipment. This begins with marksmanship skill and continues with anatomy knowledge. To be effective in the field, hunters must remember the vital zone of their quarry is a three-dimensional mass of internal organs located inside the chest cavity. The hunter can not merely hold anywhere on the animal, or even center of mass, and expect to deliver a shot capable of cleanly dropping big game. For the best chance at success, it is critical that the shot pass cleanly through the center of the vitals. In order to center the vitals the hunter must “pick a spot” to aim at somewhere on the animal’s body. How the animal is positioned at the moment the decision to shoot is made will determine where the projectile must impact the target’s body to center that vital zone inside. To quote George C. Nonte, Jr. in Firearms Encyclopedia: “Shot placement may be considered the most important single aspect of hunting marksmanship.” Where to aim (shot placement) is just as important, if not more so, than how to aim (accuracy/precision.)
This issue is more than an affection. Having a thorough understanding of target angle is second in importance only to raw marksmanship skill itself. Once a hunter has developed a usable level of shooting skill, as determined by shooting standardized position courses of fire on the range, such a maximum range drill, further practice should emphasize applying angles on a realistic silhouette in simulated hunting conditions before the hunt.
One particular guide failed to take this lesson to heart. He put his client on a trophy animal and whispered, “Shoot behind the shoulder” as a reminder. The client’s bullet gut shot the animal, forcing a lengthy tracking session. The guide reflected on the incident and couldn’t understand how the shot went so far awry because the client had demonstrated fine marksmanship the day before the hunt started. When the guide asked him the client replied that he hit the animal “behind the shoulder, just like you said.” It was then the guide realized that some eighty percent of the animal’s body is behind the shoulder. Gun selection, bullet selection, accuracy, or any of the other minor details harped on month after month in hunting magazines wasn’t the issue. The client had even proved by actual demonstration to have more than enough marksmanship skill, the lack of which is normally the primary cause of lost game. The problem in this case was a lack of understanding shot placement.
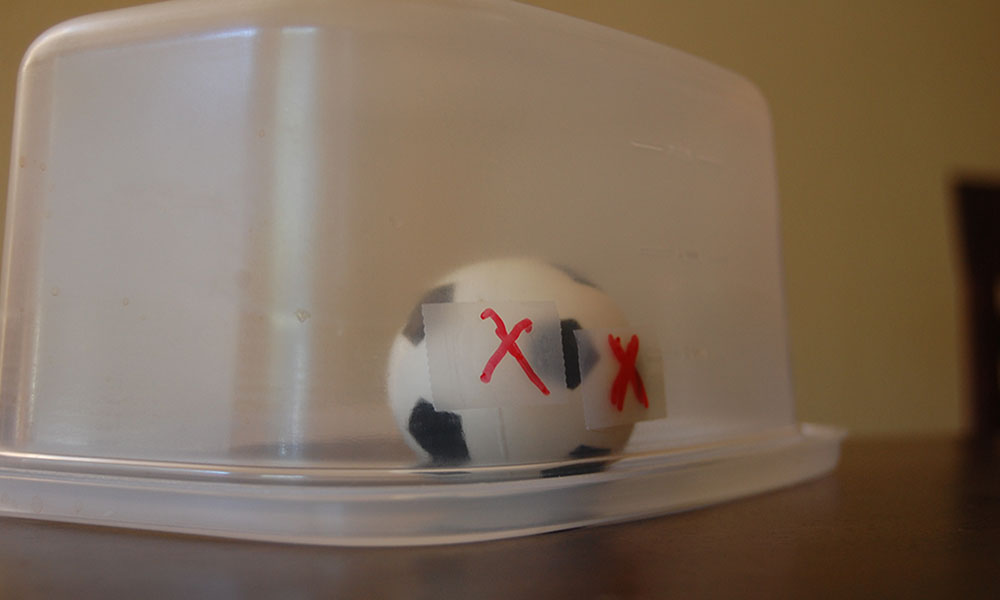
The spot you hold on will be different as the position of the animal changes relative to you. From a field marksman’s perspective, shooting from the correct target angle is just as important as marksmanship skill, raw precision, ballistics and the bullet’s terminal performance. For a crude but effective demonstration of target angle place a small sport ball, tennis or similar, on a table or counter top and cover it with an upside down square or rectangular clear plastic or Pyrex baking dish or loaf pan over the ball. Imagine the side of the pan represents the outer surface of an animal’s body and the tennis ball inside is the vital zone. Standing perpendicular to the pan, place a mark over the apparent center of the tennis ball with a water-soluble marker. Now, take a step to your left so you are angled 45 degrees to the left of the pan and mark the apparent center of the ball again. Take two steps to your right moving to 45 degrees to the right and repeat. Lift the dish and examine the marks.
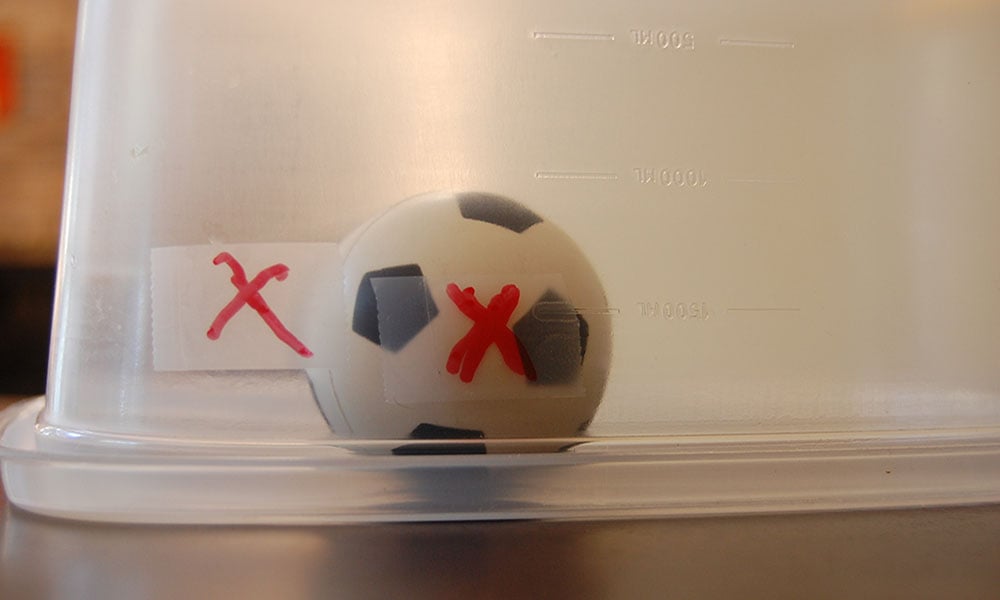
Even though the center of vitals was always the aim point, you will have three distinct marks on the pan. How can that be? No, you didn’t screw up. Each mark was the ideal point of impact to bisect the ball (vitals) from that specific angle. As your relationship to the target surface changed so too did the ideal point of impact. In order to properly bisect the vitals, your hold point on the target altered. It was your angle to the target that made the difference.
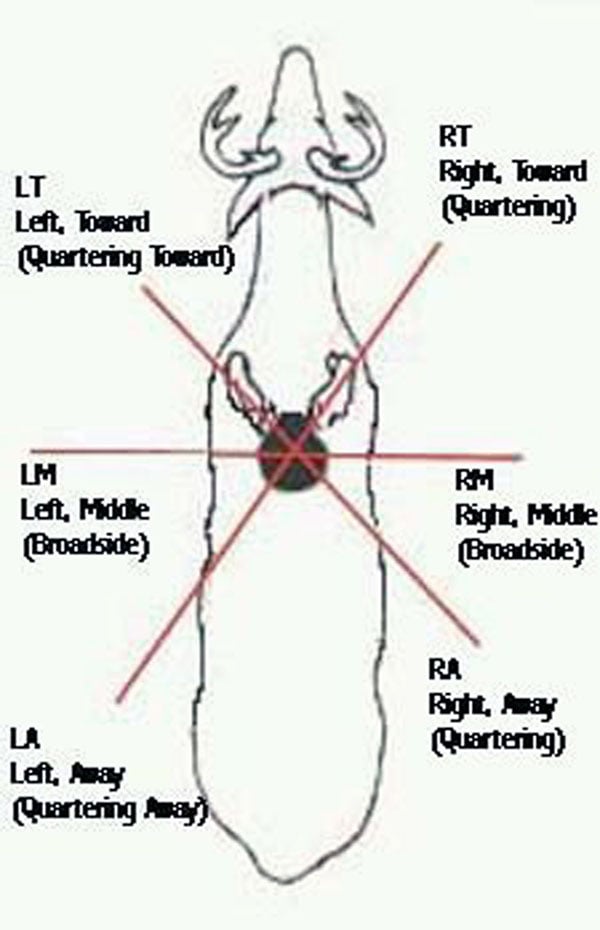
The most basic and important angles are quartering toward, with the animal is facing toward the hunter at roughly 45 degrees, broadside (middle), with the animal is facing at a 90 degree angle perpendicular in relation to the hunter, and quartering away, with the animal facing away from hunter at roughly 45 degrees. All of these target angles can be right or left. We can describe target angle in degrees, with the animal’s head like the needle of a compass. Broadside left is 270 degrees, broadside right is 90 degrees, quartering away right is 45 degrees, quartering towards left is 225. In practice, we don’t need to be quite this precise as a target angle of 130 or 140 is effectively the same quartering towards left shot but we need to understand our ideal point of impact changes as the angle changes.

The important thing to learn is for your projectile to intersect the center of vitals the impact points on the animal’s body will be different. If the hide and muscle of a big game animal were transparent, like our Pyrex loaf pan, this would be very easy to visualize and the only reason for a failed shot would be the hunter’s less than perfect marksmanship. Unfortunately, reality doesn’t work that way and this isn’t the case as we can’t see inside the animal. In a way, field shots are taken blind by necessity. The hunter is trying to hit a “hidden” target inside the animal. The only way to hit this target is to visualize it in the mind and hold to this imaginary spot. You must visualize the proper hold point, without aid of an aiming mark, and hit it. That is what target angle is about.
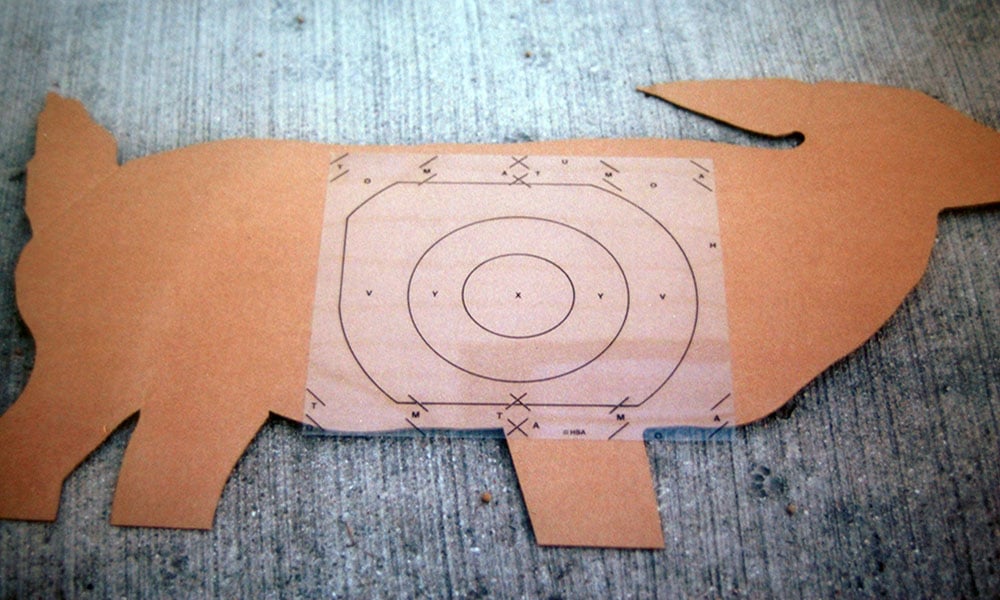
Once the idea is understood, there are a number of ways to practice this. One is to use a silhouette with multiple printed scoring rings representing the vital zone at different target angles depending how the target is placed. Another, cleaner option is a scoring overlay. The target has fixed witness marks and is scored with a clear overlay featuring several indices for each angle simulated. Better still is a target system featuring a silhouette that is shot through with the vitals on the other side. Ideally, this vital zone isn’t visible to the shooter and is always perpendicular to the line of fire, with the silhouette positioned and angled as desired.
You’re probably wondering where to get targets such as this because you’ve never seen them before. Sad, isn’t it? Given how important this issue is most targets on the market fail to take it into account. Targets with pre-printed, fixed vital zones are usable at one target angle only. Many commercial targets, such as photo realistic paper big game targets, can’t be reversed so the hunter is stuck with, say, standing broadside right.
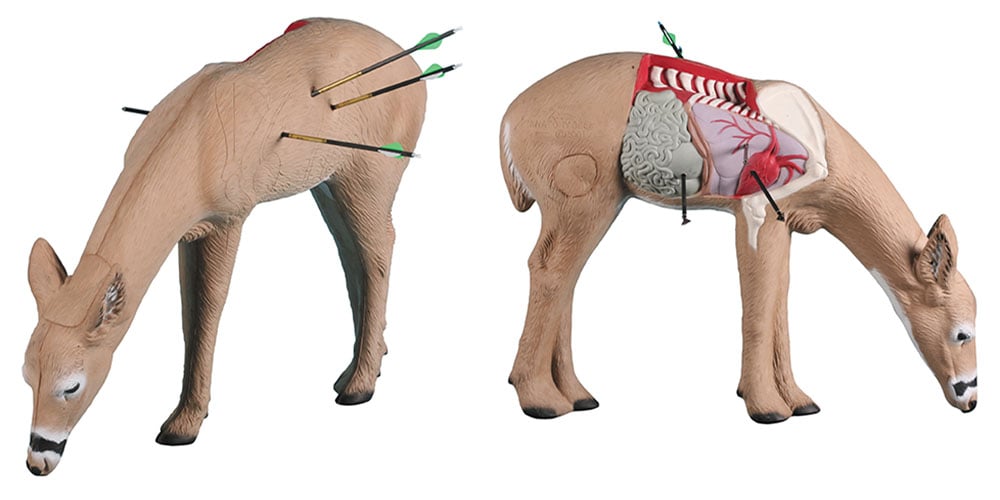
Thankfully, there are a few exceptions. One currently available commercial target incorporating this reasonably well are the anatomy targets made by Rinehart Targets. The bow hunter shoots at the side opposite of the exposed vitals, which is the three dimensional animal with no visible markings. Scoring is done by seeing what part of the anatomy the arrow hit inside, as indicated on the exposed vitals side on the other side of the shooter. The external impact point of a centered heart shot changes considerably as the angle changes.
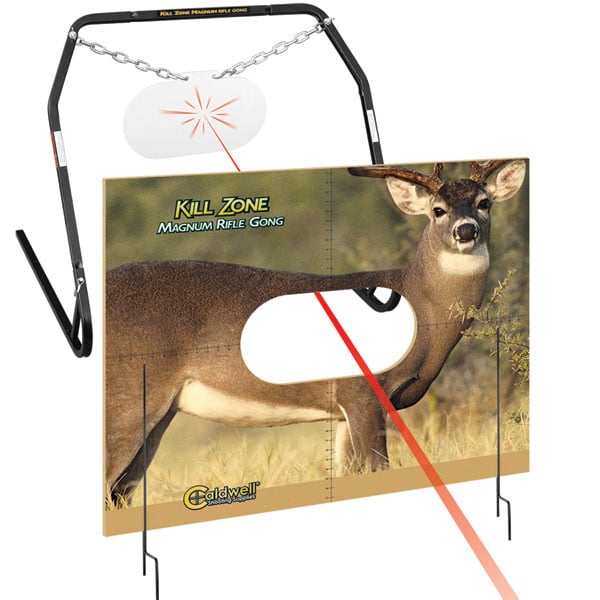
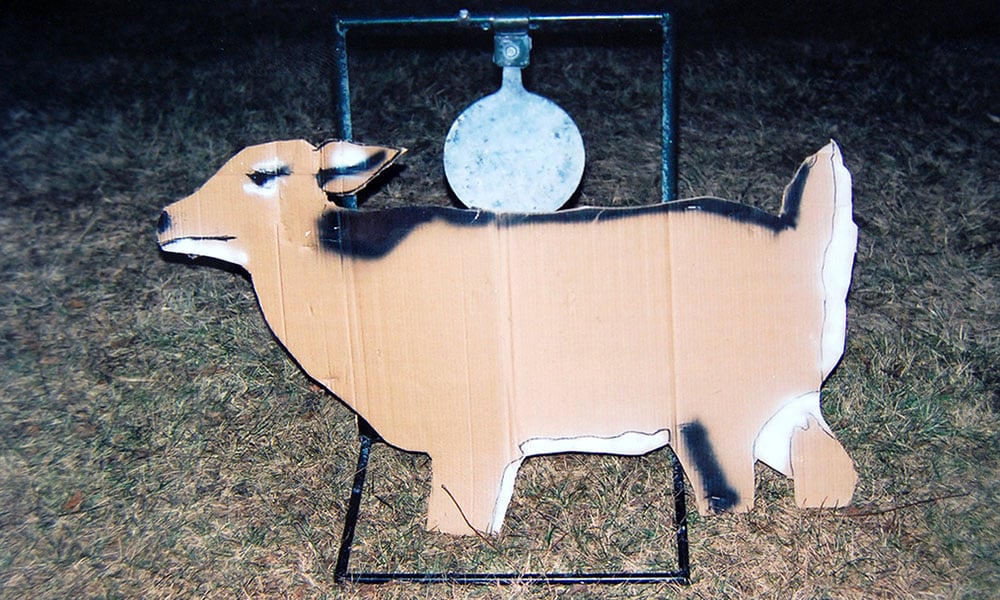
Note this is an archery-only practice target and most 3D targets, including those used in competitions sanctioned by groups like the International Bowhunting Organization and Archery Shooters Association, have scoring rings embossed externally which don’t take target angle into account. The closest thing currently available for gun hunters is the Caldwell Kill Zone Gong (caldwellshooting.com). As with the archery targets, this is a practice-only unit as nobody is currently promoting any form of competition specific to gun big game hunting. The closest thing was the Hunter’s Shooting Association (huntershooter.com) and their HunterShooter Big Game target, a cardboard big game silhouette with an overlay.
At least in practice, it is possible to properly test target angle and you can use any big game silhouette target you like. The target won’t likely have this built in. Most likely there will be markings for a broadside shot. Stand the target up and step off to one side, just like with the Pyrex pan. Visualize the vitals inside and mark the ideal impact point for a perfectly centered shot. Estimate a suitable vital zone size (or measure the existing broadside markings) and scribe an appropriate size circle around your center mark. Place that target physically angled to the shooter’s line of sight and you have target angle into account with a true three dimensional simulation.
Only an unethical hunter will go to the field in pursuit of game without preparing. This practice must include testing on a big game silhouette that simulates target angle. But be careful of the target you use as most targets on the market use a fixed scoring zone permanently printed, cut, or embossed on the scoring surface. That means you can only practice standing broadside, the easiest shot you’ll get in the field. The target you use should allow you to bend and place it in varying configurations so when you change the angle of the target, the score rings shift as well.


Leave a Reply