
Last Updated on
We all hunt for different reasons. There is the chance to get away from it all for a while, to face off against fellow outdoorsmen to see who is the most accomplished hunter, and to experience the thrill of the hunt. But just important to most is the chance to fill the freezer for the year with a natural source of meat. It can cut grocery costs for the season, and there’s a sense of accomplishment that comes with providing for you and your family. Some even like to share their harvest with others, and venison sausage or other treats can be a nice compliment to any gift or holiday party. However before you can enjoy this year’s harvest at your table, you have to take special care of the deer throughout the harvesting process. We offer some tips and equipment suggestions for your next deer processing job.
Careful Field Dressing
Successful processing of your deer naturally starts with careful field dressing. For a more in depth examination of this process, we recommend: How To Field Dress A Deer.
The key is to keep the meat clean as you field dress it. Leaves, hair from the hide, bugs, and internal organs are all your enemy, and exposure of each to the interior cavity and meat should be minimized or hopefully completely avoided while you’re out in the field. As we mentioned in the field dressing guide, careful removal of the intestines is the most important facet of preserving meat during the field dressing process. Another important and overlooked tip is knife care. Cleaning the knife periodically throughout the field dressing process will reduce the risk of contamination and keep the knife sharp for the entire process. The easiest way to take care of your knife is to bring alcohol wipes along with your field dressing kit. Finally, don’t forget the gloves. These days gloves aren’t optional, they are a must during field dressing. Be sure to bring several pair just in case.
Once you’re finished with the initial field dressing, you’ll want to protect the deer from bugs as you get ready to transport it. A game bag is always the best option for this, but acting quickly once the field dressing is complete is just as important. Some hunters prefer to just finish the field dressing and hop to it to get the deer to their truck, but unless it’s only a very short trip from the deer to the truck, a game bag is cheap and probably worth the investment if you’re serious about meat preservation. Will not using a game bag mean contamination? Well it likely won’t, but proper meat care is about minimizing exposure to contaminants and getting the deer to cool quickly. Let’s move on to that second part now.
A Word On Transportation
The next question on meat care comes down to: “Quarter or not to quarter in the field.” Again this decision is usually dependent on your location and how close you are to home. You’ll also have to take into account whether or not your state requires a visit to a check station. If you’re headed back to a hunting cabin without a proper fridge, then a cooler is going to be a vital piece of equipment. Yeti is the big name in outdoor coolers, and they are rugged enough and hold ice long enough to make them worth the extra investment. Using a cooler also means that you’ll need to quarter the deer to fit it in the cooler. It can be hard to quarter right at the initial field dressing site and keep everything clean, but some hunters swear by it. After skinning and quartering you can place the deer in the cooler, but make sure to periodically drain the water out and replace with more ice.
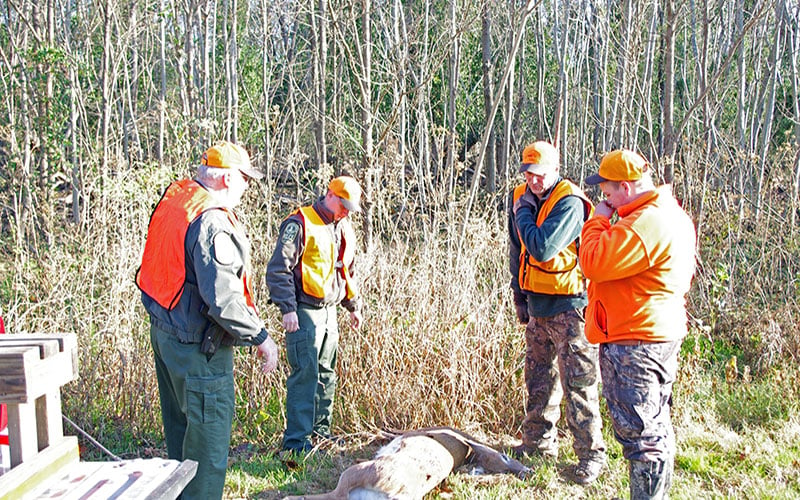
Those who don’t want to or can’t quarter on-site should have a plan for safe transport of the deer out of the field. ATVs, deer carts, or even just a strong buddy are good options, but dragging the deer out by yourself won’t be the best option since you’ll be risking additional contamination. If you’re going to just jet home with the field dressed deer and process it at home, make sure you prepare for that option before you ever head out to the stand. The deer should be covered when possible since direct sunlight can speed the spoiling process, and again a game bag is a good choice if it’ll be riding in the back of your truck for a while. Sorry folks, mounting the deer on the hood isn’t exactly the best plan anymore. Another good tip for those who choose this option is to have a frozen gallon jug of ice to place in the cavity on the way home. Ice bags aren’t the best choice because you don’t know where the outside plastic has been. Instead save those milk jugs, clean them well, and then freeze them and leave them in your truck for a potential harvest.
Where To Process
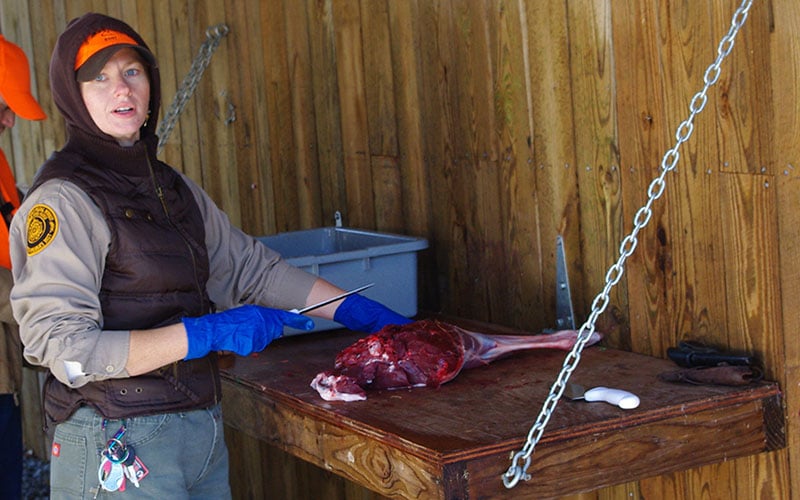
Once back home (or at the appropriate place), you’ll want to set in on the skinning and quartering process almost immediately. This is easier than in the field because you can meticulously skin the deer while it hangs in a suitable spot. Garages, sheds or similarly cool places are the best options for skinning and quartering. Make sure to keep the ice in the cavity to help the meat cool down, and only remove it when washing the deer. Washing the interior cavity is an important step and helps increase the quality of meat and remove any lingering contaminants. Once again, clean the knife regularly while working through this process, especially whenever you cut through any bone. Never cut into the skull, and clean the knife immediately after cutting into the spinal cord or bone.
Final Tips
Hunters differ on this next part as well, and we’ll cover both approaches. The first is to leave the deer, washed and filled with ice, hanging to age overnight. This can be an option on a very cold night, but if the weather is warm, you’ll need to pack it away into cold storage once it’s skinned and quartered. You can either place it in a cooler and replace ice as it melts (while regularly draining the water), or if you have an extra fridge, you can place the meat in there. Before you get started, check out one of the deer cuts charts you can find online.
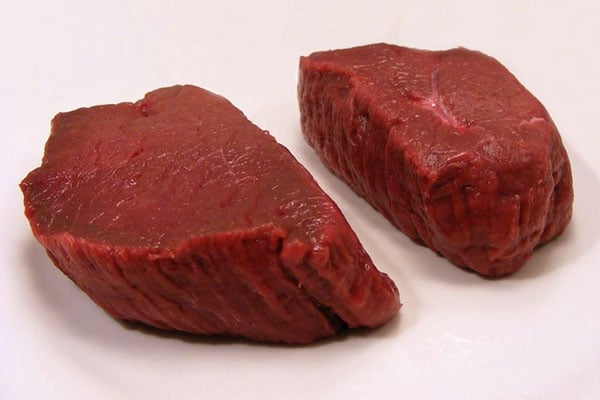
As you start to de-bone the meat, take your time and be sure to cut out all tendons, fat and “sliver skin” or connective tissue as you work through the quarters. You’ll want to wear gloves throughout de-boning just like you have throughout the processing. Don’t forget to sanitize your cutting surfaces before beginning, and then give them a good scrub and wash periodically throughout the process. When possible, cut meat against the grain rather than with the grain for added tenderness. This is a trick that many cooks do with beef as well.
Finally, you’ll want to freeze everything you’re not sending to be processed further right away. Many hunters make burger out of the less tender cuts and freeze it afterward. A vacuum sealer can be a good investment for DIYer’s, but you can get by with pressing air out of freezer bags best you can. The meat is best from the freezer during the first six months after harvest, so plan your meals and send your friends some meat to make the most of your successful hunt.
Images one, two and three and thumb courtesy of Wikimedia Commons.


Leave a Reply