
Last Updated on
Continued from Scout Rifles Part 1.
The Scout Rifle concept has been in development for several decades now. Initially, obtaining these features was a custom-only proposition. However, as the word spread manufacturers were slowly wrangled into producing purpose-built equipment. The most notable of the factory options is a complete – and expensive – scout rifle manufactured by Steyr. While pricey, it is cost comparable to custom propositions and comes closest to meeting the established criterion. The Steyr rifle is the only rifle to meet all of Cooper’s original requirements to be called a “Scout.” It weights 6.6 pounds, has an overall length of 38.9 inches, is chambered in .308 Winchester, comes with a user-adjustable trigger and a smooth bolt.
The Ruger GSR (Gunsite Scout Rifle) and Mossberg MVP Scout has more recently entered the fray with their well-received options, but for a good while, Savage was the only other factory option and it remains among the most cost effective. Originally offered as the Savage Model 10 FCM Scout, Savage’s current offering is the 11 Scout which adds the company’s AccuStock and AccuTrigger.

A scout rifle offers a number of worthy advantages worth investigating, but Steyr’s offering is probably out of the price range of a rifleman who is interested in trying one out. Do-it-yourselfers on a budget have options but here we’re trading dollars spent at the gun shop for time spent in the workshop. The Savage Scout, Model 10 FCM, is the most basic factory option. Sold with the claim of being a scout rifle (it even says so right on the bolt), it is considerably cheaper than the Steyr.
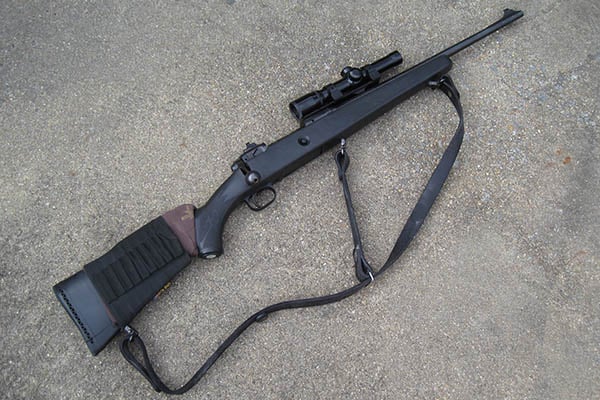
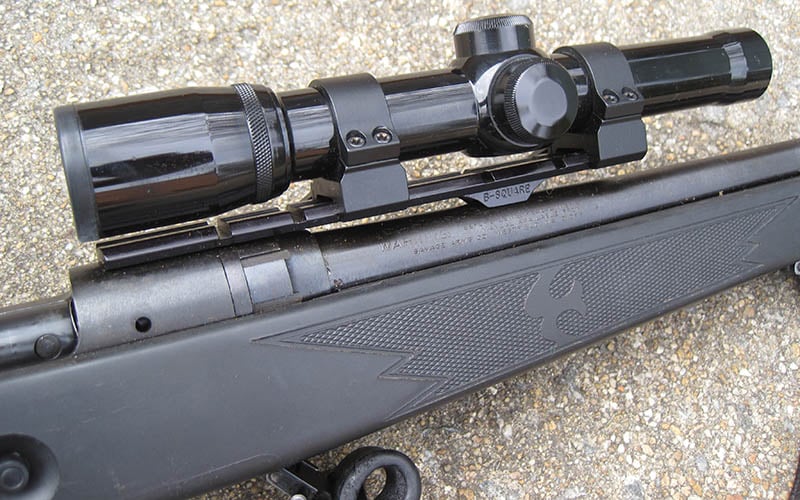
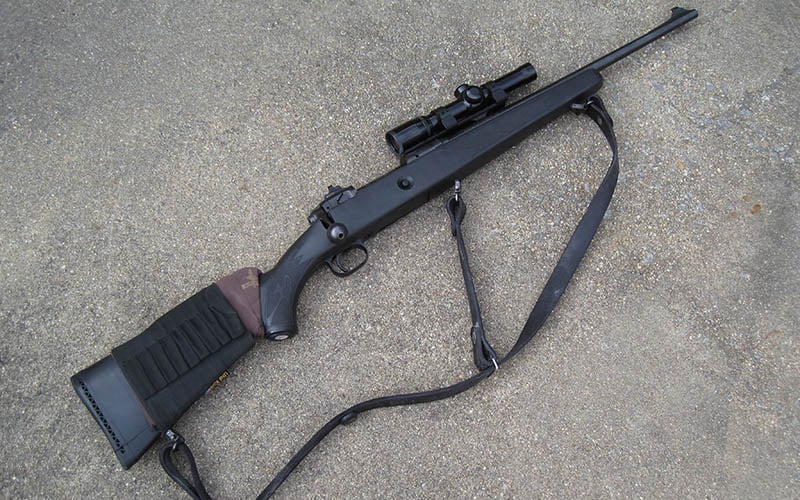
The Savage entry features a blued short bolt action with a large ball handle dual pillar bedded in a checkered synthetic stock, a detachable four-round box magazine, a forward-mounted B-Square scope base that accepts standard Weaver rings, two Uncle Mike’s-type detachable sling swivels, an adjustable Williams ghost ring rear-sight with standard gold bead front sight, and an, uh, “original” sling/carry strap. The base rifle, sans scope and sling, weighs in at 6.25 pounds, measures 39.75 inches (with a 20 inch barrel) and can be had in left or right hand versions chambered in 7mm-08 or .308. The suggested retail price was $559.00 and it typically retails in the used or aftermarket for just over $400.
Jeff Cooper, primary inventor and proponent of the scout rifle concept, has proclaimed Savage’s initial M10 FCM as “simply an economy version of the general idea.” Basically, Savage took one of their model 10FC (short action, synthetic stock, detachable magazine) rifles, screwed a B-Square scope base to where the rear iron sight and front scope base normally goes, bolted a Williams adjustable economy sight in place of the rear scope base, asked an engineer (likely suffering from a hang over at the time) to throw together something resembling a sling, and inscribed “Savage Scout” on the bolt.
The bad news is, as most purists are quick to point out, this offering is technically not a “true” scout rifle and suffers from a few quirks (more on this latter.) That said, I think Savage assembled a solid rifle. It offers terrific economy and is fairly priced even among more traditional designs, to say nothing compared other scouts. The money saved over purchasing the Steyr’s base model is enough to buy a good Ching Sling and professional instruction at the shooting school of your choice along with some of the needed ammo for the class. The Savage-armed rifleman, having good marksmanship instruction and careful range practice, trumps the Steyr-armed rifleman with neither.
Yes, you can roll your own scout but even if you bothered to scrounge the components and got them for less than what you would pay for a Savage, after factoring in what your time is worth, I still think the Savage is a better buy. The worst thing that can be said about the Savage is that it is a quality, short bolt-action rifle. It’s even drilled and tapped for conventional scope mounts, should you later decide to go that route.
Improving the Savage Scout
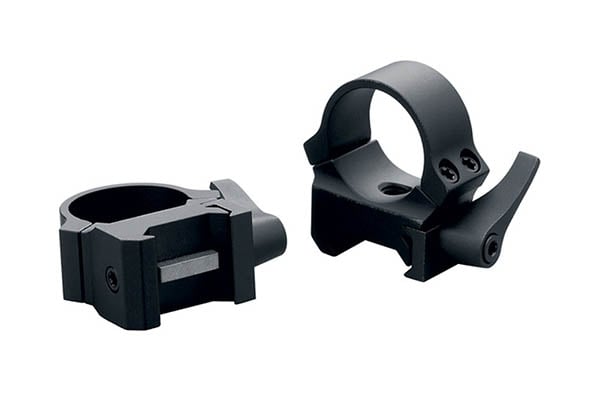
While this rifle is pretty good out of the box, there are a few things that help bring out its full potential. Starting with the primary sight, the only thing that needs to be done here is to Loctite the mounting screws on the base, purchase a Scout scope (Leupold and Burris are the only two options currently) and obtain a set of low-mounting, quick-detachable rings. Low mounting because we want to keep the line of sight as close to the bore line as possible and quick detach because we want to option to switch to back up sights immediately; either a spare pre-zeroed scope (if you have it available) or the on-board iron sights. I opted for the excellent Leupold QRW low mount rings. The scope comes on or off the two and a half turns of the mounting screws and I was pleased to confirm Leupold’s claim that these rings return quite close to zero.
Unfortunately, even with low rings, the factory base puts the scope a bit higher than ideal, requiring a jaw-to-stock weld. The easiest solution I’ve found is Beartooth Product’s comb raising kit. Five foam slices of varying thickness can be mixed and matched and secured with a non-slip rubberized cover to customize the comb height for you. Adjusting for a perfect fit when using the primary sight will make the comb a tad high, but useable, for iron sights.
After you’re done adjusting the cheek piece, add a butt stock ammo carrier such as Kolpin’s. The non-slip material and slightly larger-than-normal fit of the comb kit makes this inexpensive ammo carrier stay in place surprisingly well and carries two full reloads on the rifle. Remove the rear sling swivel, place the material from the cheek piece cover and ammo carrier over the hole and re-screw the swivel back in. This will help prevent them from riding forward.
Fixing The Savage Scout
In my opinion, there are a few things that Savage got wrong with this rifle. Fortunately, they can be rectified. First, lets talk slings. Any rifle claiming to be a Scout should automatically include three attachment points to use the excellent Ching Sling. If I were king I’d order every field rifle, Scout or not, to use this sling. Eric Ching’s design is that good. There are solid options for two point-only attachments – such as Ching’s Safari sling, the Rhodesian Sling by Andy Langlois, and the Pronghorn sling – but the Ching Sling is still the easiest to employ at speed.
Of course, Savage has the traditional two points and instead originally included, uh, something else. Remove this dog leash, take out the barreled action, and gently secure the stock in a bench vice. Obtain an Uncle Mike’s machine screw sling swivel and drill a hole as close to the magazine well as possible following the included instructions. Note that the screw is too long and will interfere when reinstalling the barreled action. Cut the screw down to the nut and fasten.
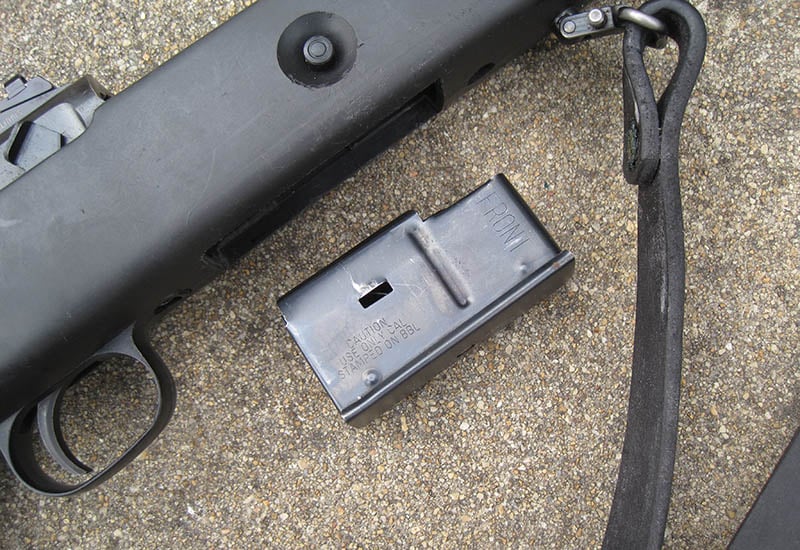
The other gaffe on this rifle is the detachable magazine. The included magazine works well, but every spare I’ve bought to date has required additional fitting. Apparently, this flaw is “normal” for Savage rifles. As a side note, I’ve shot 1911 pistols for years. Quality eight and ten round aftermarket magazines interchange flawlessly between the dozen single stack .45’s I’ve owned and shot right from the box. Yet the Savage-produced magazine made for a Savage rifle, costing three times more than many aftermarket 1911 magazines, will almost always require fitting. True, if you order your magazines from Savage at the same time you order your rifle their custom shop will fit them for you. To Savage’s great credit, they will fit their magazines at their factory for no additional charge if you already own one. If you’re going to buy a Savage, contact them and have the magazines fitted at the factory.
One final booboo has to do with design quirk with the basic Savage design. As you probably know, for best potential accuracy the lugs on a bolt action should bear evenly when in battery. The traditional method to achieve this consistency was to hand fit the fixed lugs. Unfortunately, the time and skill needed to do this would be prohibitive for mass produced arms. Savage simulates the basic effect with floating lugs.
Instead of the lugs being integral with the bolt, as with traditions Mauser actions, the lugs on a Savage rifle are separate from the bolt body and attached with a pin. Unfortunately, as with any moving part, this is subject to wear. For ultimate durability, the best course of action is to upgrade to Savage’s “Magnum” bolt (designed for high pressure cartridges) or plan to replace this pin every 500 rounds or so. Due to the sad state of organized shooting in this country, most hunters will never wear one out. Again, to Savage’s credit, they will replace this part for free.
Adjusting The Trigger
While we have the barreled action out of the stock lets have at that trigger. Savage’s current AccuTrigger is user-adjustable while in the stock and has a safety catch built in. However, older Savage triggers, such as found on the original Model 10 FCM, and the more current Axis and Stevens models don’t include the easily-adjustable AccuTrigger.
While there are aftermarket units available, the more basic Savage/Axis/Stevens factory trigger offers reasonably adequate and safe adjustability for a field rifle. There are two adjustments: the trigger spring and sear engagement.
The trigger spring appears to be a thick piece of wire on the starboard side that rests against a vertically oriented screw with a shallow notch ground in it. Turning this adjustment screw to reduce spring pressure will lighten the trigger pull. However, turn too far and the screw exerts no pressure and jarring the rifle may cause discharge. Back out this screw just until it exerts no pressure on the wire spring and retighten one revolution, or two clicks. This is the minimum amount of tension you should have, and may need more.
The other adjustment is sear engagement, a vertically oriented screw located on the trigger, just in front of the trigger spring adjustment screw. Clear the action, close the bolt, and adjust this screw until the striker releases. From this point, back out the screw 1/8 to 1/4 of a turn. This will give a minimum engagement, but you’ll probably need more. Test to see if it is sufficient.
These triggers use “trigger block” safeties, meaning that the safety only prevents the trigger from moving, thus requiring the sear to hold the striker.
WARNING: Improper adjustment leaving inadequate sear engagement will leave you with a rifle that can discharge with the safety on. After any trigger work safe operation must be confirmed. Read that again until it sinks in. And if you not 100 percent sure you can adjust it properly, have a gunsmith do it for you.
Starting with an UNLOADED rifle, test that it remains cocked, even when the bolt handle is slammed shut, the trigger pulled with the safety on, and the butt is slammed against the ground with the safety on or off. Test and retest several times. Test and retest for several dry practice sessions. Then, and only then, test at several live fire practice sessions. Then shoot a couple of matches, preferably with a nice trophy or prize on the line. If Murphy doesn’t rear his ugly head after all this, the adjustment may be considered worthy for field use. And if you think it silly to go through all that, do NOT mess your trigger to begin with!
Follow Up Shots
All riflemen realize the benefit a good trigger provides them, but less often discussed is how to tune a rifle for fast follow-up shots. Yes, we should all live by the credo, “One Shot, One Hit”, but even the best can make a mistake and the rest of us need even more help. And it is always prudent to snick the action and be ready to continue shooting, even when that second shot isn’t necessary. Nothing is more ridiculous than a neophyte doing a “Pause-and-Gawk” who suddenly realizes a makeup shot is needed and his rifle is at waist level with an empty cartridge case under the striker.
Out of the box, Savage bolt guns are reasonable but a little tuning can make them even better. The bolt opens a bit hard but can be smoothed by polishing the bearing surfaces, such as camming surfaces, the bolt body, and anything else that rubs. The most important areas to check and polish include:
- The Rear Baffle Assembly’s contact points with the Bolt Body and Bolt Handle.
- Bearing surfaces where the Cocking Piece Pin meets the Bold Body.
- Race ways, where the Bolt Head rides inside the receiver.
- Use fine grit. Remember, we are polishing and don’t wish to remove metal. When finished, clean, lightly lubricate, and reassemble the bolt.


Leave a Reply