
Last Updated on
By Seth Nadel
We will start with the basics – when you fire a round of rifle or pistol ammunition, the primer explodes and sets the powder on fire. As it burns, it generates a lot of gas – in some cases, up to 55,000 pounds per square inch. The pressure pushes in all directions causing the case to expand and seal the chamber. The bullet is forced from the case, enters the rifling, and reduces the pressure, until it leaves the muzzle and the pressure drops to zero.
The case springs back, but not completely to it’s original size. So we have the expended primer, the slightly oversize brass case, and hopefully a hole exactly where you want it in the target. You want to save that brass – we can use it again, several times actually.
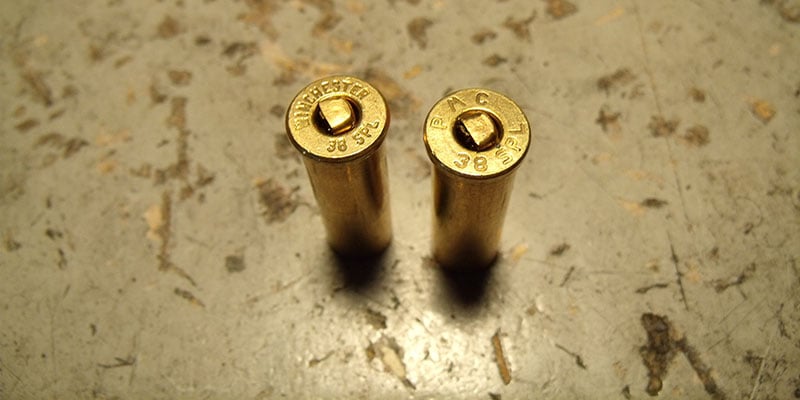
The very first step is to inspect that case – and we will inspect it many times before it re-enters the chamber of the gun. First of all, what is it made of? Only brass cases get reloaded, and not all of them. If the case is steel or aluminum, discard them for reloading. Next, use a flashlight and look into the case – if you see one fairly large hole in the center of the base, keep it. If you see one or more small holes, offset from the center, it goes into the “brass box.”
There are two priming systems in use: the American Berdan system invented by General Berdan, and the Boxer system, invented by an Englishman, General Boxer. Europe adopted the American Berdan system, while we adopted the Boxer system. Berdan brass has an anvil, the part the priming compound is slammed against, built into the case. They can be reloaded, but generally they are not worth the trouble. The Boxer system has the anvil in the primer, so it can be pushed out of the case with a simple pin. Those are the cases we want.
At the same time look for any visible defects in the cases – splits, cracks, deep dents, and the like. These cases also go into the brass box. This box I keep mentioning gets all the bad brass, and expended primers. Every so often, I take mine to the recyclers and then take my wife out to dinner on the proceeds – a winning proposition!
The next step in the process is cleaning the brass, as it will have crud on it. Even if you fire the round, and remove it directly from the chamber, it will still have the products of combustion of the prior round, which can increase wear on your reloading dies, and even on the chamber of your gun if not removed. Most everyone uses a vibratory cleaner, filled with crushed walnut hulls or corn cob grit and a touch of brass polish. After a while, the cases come out shiny as new. This, and every other time you handle a case, is another chance to look for defects. When in doubt, throw it out!
If you are loading for maximum precision, sort your brass by maker – and keep one lot from one maker together. In part one, I mentioned that brass has a service life, which is dependent on such things as caliber, type (straight wall or bottlenecked), is it fired in just one gun or several guns of the same caliber, and how high is the pressure of the load you use. Back in 1970, I shared a case (1,000 rounds) of .45 ACP 230 grain ball ammunition with a co-worker. After shooting it, I kept the brass, which happens to be nickel plated, for use in my bullseye .45. These target .45 rounds are a low pressure load, and ammo in this game is loaded for precision at the lowest possible pressure. This is why, 45 years later, I am still using this brass for bullseye competition! I was, for years, very active in this form of competition, but then I dropped out for about 15 years. Now, I am getting back into it, with the same loads in the same brass!
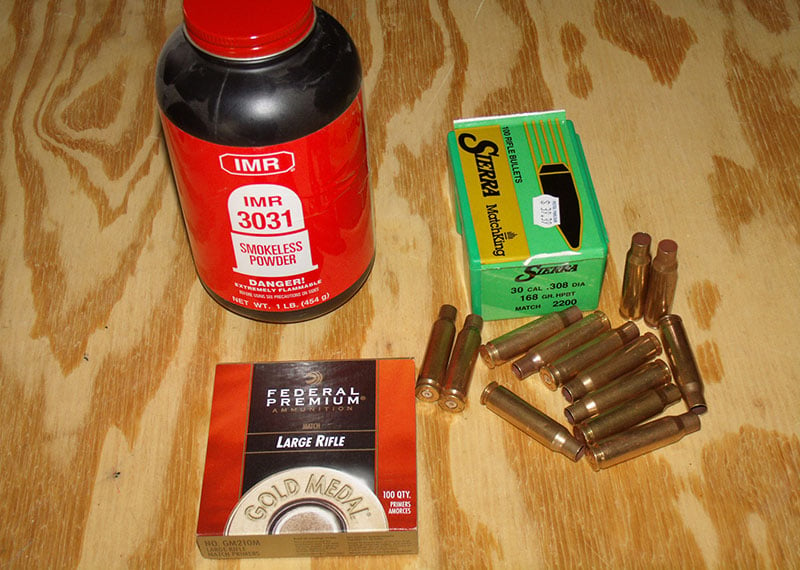
Our next step is simple, but critical – use a reloading manual to find a safe load for the round. This means selecting the bullet weight and velocity you want to use. Once again, we MUST be concerned about pressure – our friend, and our enemy. Too much pressure, and you can blow up your gun. Too little, and the bullet gets stuck in the bore, and with the next shot, you blow up the gun.
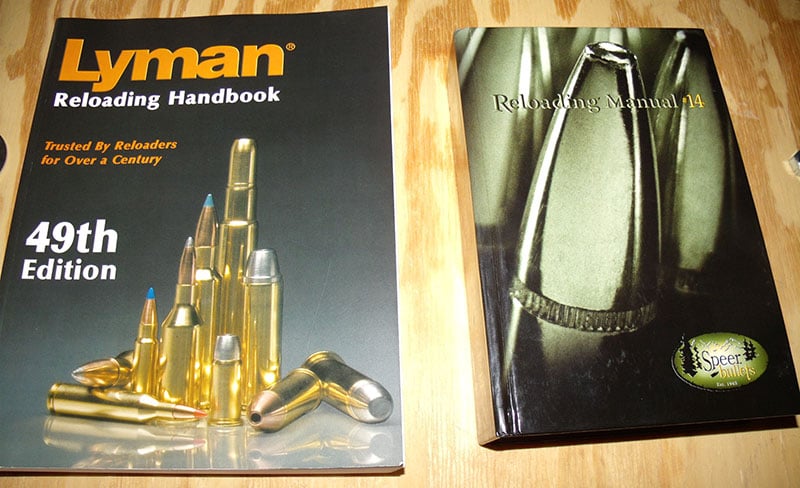
I am concerned enough – heck, I am a coward – about blowing guns up, that I will only use a medium load, confirmed in two (2) different reloading manuals as safe. The manuals are published by bullet makers, powder makers, and reloading tool makers. Make sure you are looking at the exact cartridge you want to reload, as many have similar names. There are several different 9mm rounds, including but not limited to 9mm Makarov, 9mm Kurtz (aka .380), 9X21, 9X23, 9mm Styer and 9mm Luger – this last one is the one we usually want. By the way, the same round is the 9mm Luger, 9mm Parabellum, 9X19, and some other names.
Let me add some words about getting load data from the internet – get it ONLY from the web site of the powder maker or bullet maker! NO EXCEPTIONS! Any 12 year old can sit in mommy’s basement and claim to be a master reloader who has a secret formula to make your round go faster and never miss! Or, the person makes a small typo and has you use the wrong powder. Or, the load works in his particular gun, but it will blow yours up – there is that ‘tolerance stack’ thing again!
If you want your bullet to go faster than what is offered in the manual, don’t think: “Oh, the lawyers keep them from publishing the real top loads.” It‘s not true. If a 150 grain .30 caliber bullet is what you want to use, try a 308. If that is not fast enough, go to a 30-06, or a 300 Winchester Magnum, or some other round. Buy a bigger gun rather than risk blowing your gun up! More information about powders is coming later, so read on.
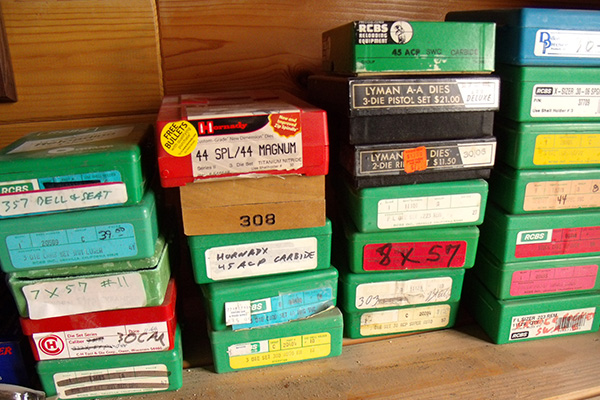
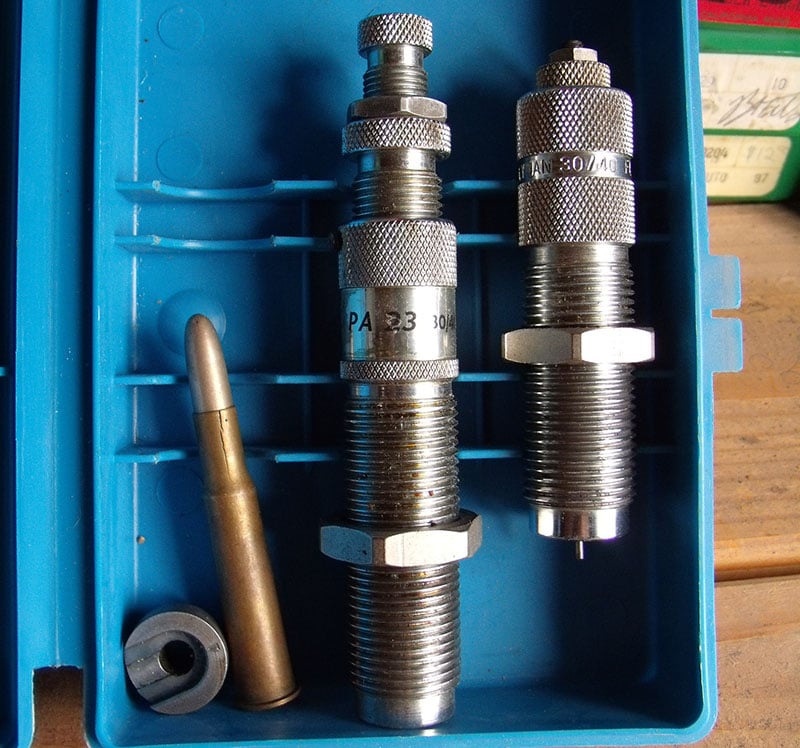
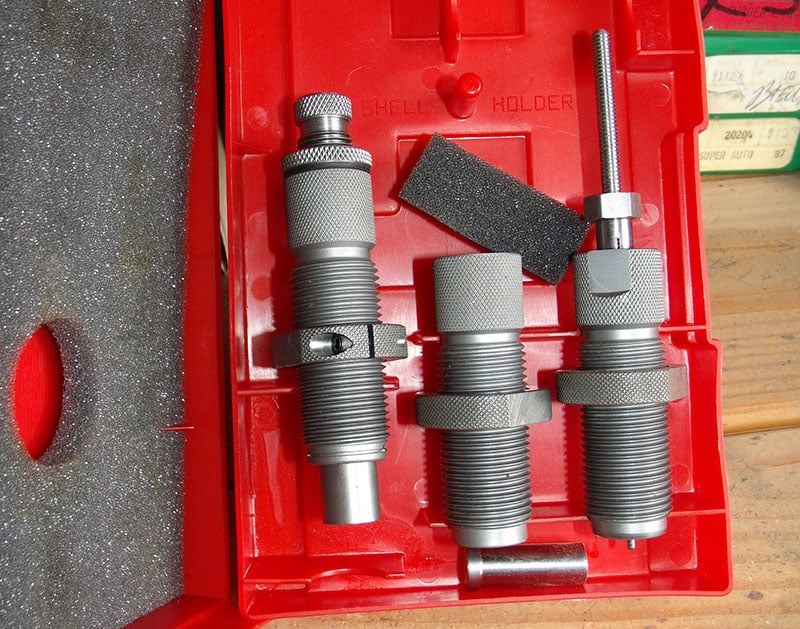
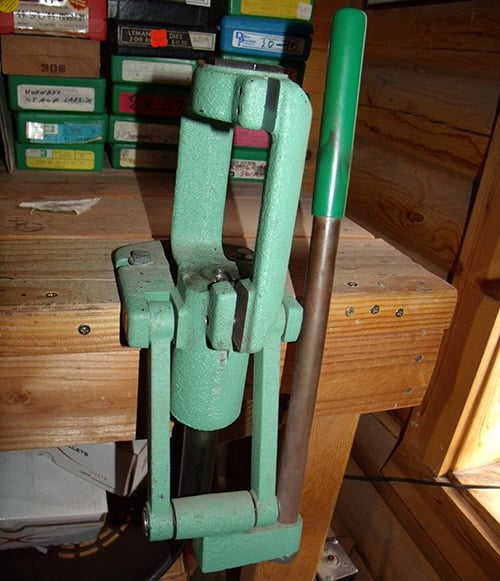
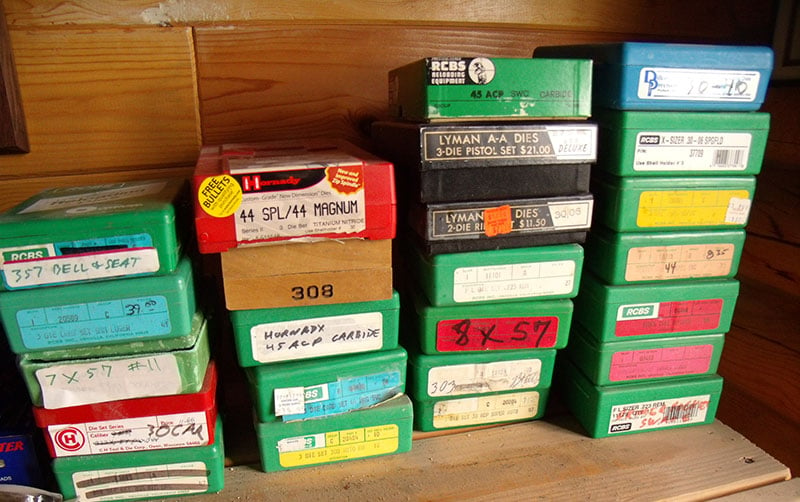
Confirm you have safe data for the components you will use, and we can start to load ammo. You will need dies to go in your press for each caliber you want to load. These days, all dies are made with the same thread size, so any make dies will fit into any make press. You also need a shell holder – one may fit several calibers, as the .308, 30-06, .270, .45ACP, and several other calibers use the same shell holder. If the case you are reloading has a bottleneck (bullet diameter is much smaller than case diameter, like the .308 or ,357 SIG), you typically get a 2 die set. One die resizes the case, knocks out the expended primer, and expands the neck just enough so you can seat the new bullet. Straight wall cases (.38, .357 Mag, .45 ACP, 45-70, and others) require a three die set, as belling (expanding) the neck is a separate operation.
There are also regular (steel) dies, and for some rounds tungsten carbide or titanium nitride dies. These remove the need to lubricate the brass before running through the die with straight wall cases. Bottleneck cases still need to be lubricated, but the dies will last much longer. I use these kinds of dies for high volume pistol loads. In rifle loads, since you still have to lubricate the brass, I save the money and use the plain steel dies.
The dies come with detailed instructions on how to set them up. Folks, save yourself the trouble, and read and follow the directions! Set up wrong, you can destroy the dies as well as damage the brass.
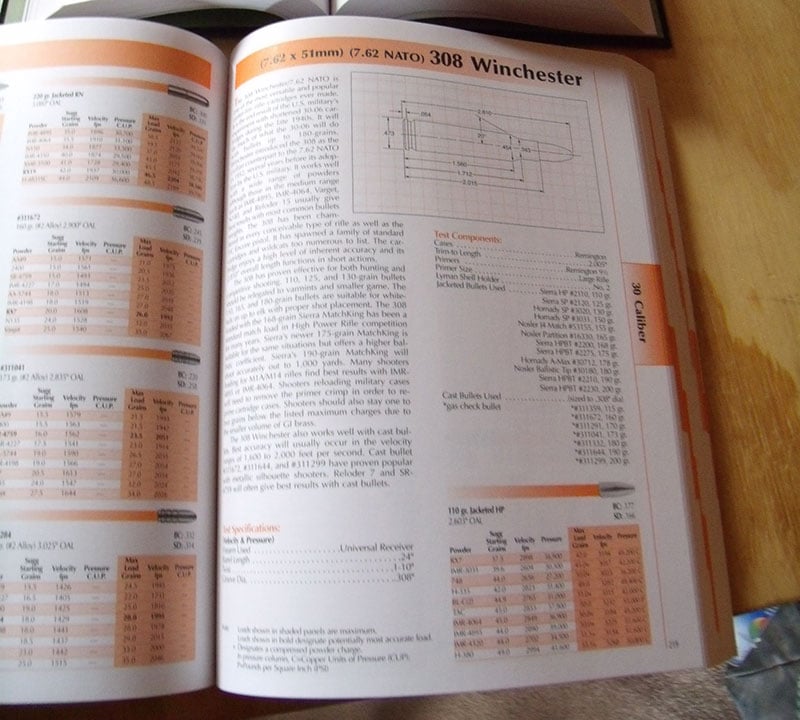
You now have clean, segregated brass, plus all the tools needed. Let’s start with a bottleneck rifle case, like the .308. Since this is also the military 7.62 NATO round, you need to be careful to remove any foreign made, Berdan primed brass. Also, military cases (marked with the year of manufacture and the makers initials on the head, but not the caliber) are thicker than commercial cases (marked with the caliber 308 and makers name on the head), and they use a bit less powder. The military cases are designed to be used in machine guns where they are subject to much higher forces than even in a civilian semi-automatic rifle. Mixing the cases will result in less accuracy, and possibly higher pressures.
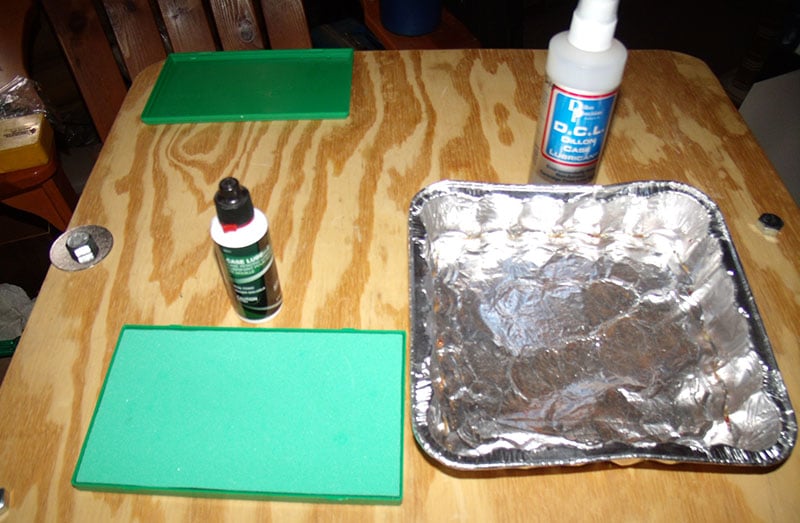
There are two common ways of lubricating the cases, pads and sprays. With a pad, you place some lube on the pad, and then run the cases back and forth to get the lube on the cases – and your hand. With the sprays, you can use a pie tin (forever after kept OUT of the kitchen), and just put in a single layer of cases to be lubed. Spray on the lube, shake the pan, give it a few minutes to spread over the cases, and you are good to go.
With your sizing die and shell holder in the press, which you have bolted or “C” clamped to the table, insert the case into the shell holder, and raise the ram into the die. The expended primer will pop out of the case (and hopefully land in the press containment system, not on the floor). On most presses, you can reprime the case on the down stroke by placing the new primer into the little cup. I don’t like to do this, as the lube on your fingers is not good for the primer, and in some cases can ‘kill’ the primer, rendering it inert. Plus, my ‘fat fingers’ don’t fit well in these small spaces.
Once the cases are sized, you need to remove the lube from them. The easy way is on a paper towel, folded over so you get two sides at once. If you see any dents on the case, particularly at the shoulder, you used too much lube. They are not dangerous, but may not make the most accurate ammo.
Now that the cases are sized and dry, you need your calipers. You MUST measure each case, and trim back any and all that are too long. As the cases are fired, they start to stretch, thinning just in front of the head and growing at the neck. If they’ve grown too long, the brass gets into the throat of the chamber, and pressure skyrocket! Always check and trim every bottleneck case! There are simple hand held case trimmers, ones that you can mount on your reloading bench, and even powered trimmers if you load a lot. For match accuracy, trim all the cases to the exact same length.
With the cases trimmed to length (shown in your reloading manuals), you can seat the primers. There are, as I mentioned, priming systems mounted on the press. There are bench mounted priming tools, and there are hand tools. Primers are amazing – as long as they are not subject to impact, they are very stable! I have managed to mash primers flat sideways, without detonation! There are, however, some safety concerns. Keep primers away from flames and heat, and store them in the original containers. Never, ever dump primers into a glass jar or other container where they can contact each other. If dropped, they have a tendency to all detonate, with lots of “negative outcomes.”

Primers come in two sizes and several types. Large rifle and pistol primers are exactly the same size, as are both types of small primers. If you use a rifle primer in a pistol because they have harder cups, you may get misfires. They also have more priming compound, which may cause higher pressures. The real danger comes in using pistol primers in a rifle. Here, the softer cups may allow the higher pressures to blow the primer out of the case, allowing those high pressures into the action of your rifle, and into your eyes. I choose to use brass colored primers for pistol loads, and nickel primers for rifle ammo. Thus if I find a primer that has escaped its’ container (they are good at that), I can return it to the proper one.
Primers are seated flush, or very slightly below flush to the base of the case. If the primer sits ‘high’ it may keep a revolver cylinder from turning. In other guns, it may go off as the bolt is closed, wrecking the gun and any parts of your body nearby. The fastest check of primers is to place the primed case on a flat surface, base down. If it wobbles at all, the primer is most likely a bit too high. You will quickly develop a feel for properly seating primers, just remember, it’s NEVER a good idea to try to “snap” a primer into the case!
Interested in more reloading how-tos from Seth Nadel? Check out: Reloading Part 1: The Key To Being A Better Shot.


Leave a Reply